Thursday, February 24, 2011

Take a Brake

 About a week ago I ordered these drilled and slotted rotors for the SC/302 for Valentines Day. Drilled rotors for you car are the way to go. Hands down. But slotted rotors have both their ups and down. Slotted rotors are used mainly  in race cars and the slots (the lines across the rotor) help grab the brake pad to slow it down quickly. The bad thing is that slotted rotors eat away at your pad faster because they are braking harder. Luckily these aren't full-on slotted rotors, so the pad should last quite a while. The drilled factor of rotors though, provide a HUGE improvement over stock because the holes allow the disc to stay cooler and vent heat easier, keeping the friction tight, and your brake fluid cool.

 My brakes were about as bad as they can get. The pad was completely gone, and the rivets were being used to slow down the disc. I highly recommend not doing this.

 This is the old pad (front) compared to the new pad (in back), you can see there was literally nothing left.

 My mess scattered all over the place

They look pretty dang good if I do say so myself

Tuesday, February 22, 2011

Custom Cold-air

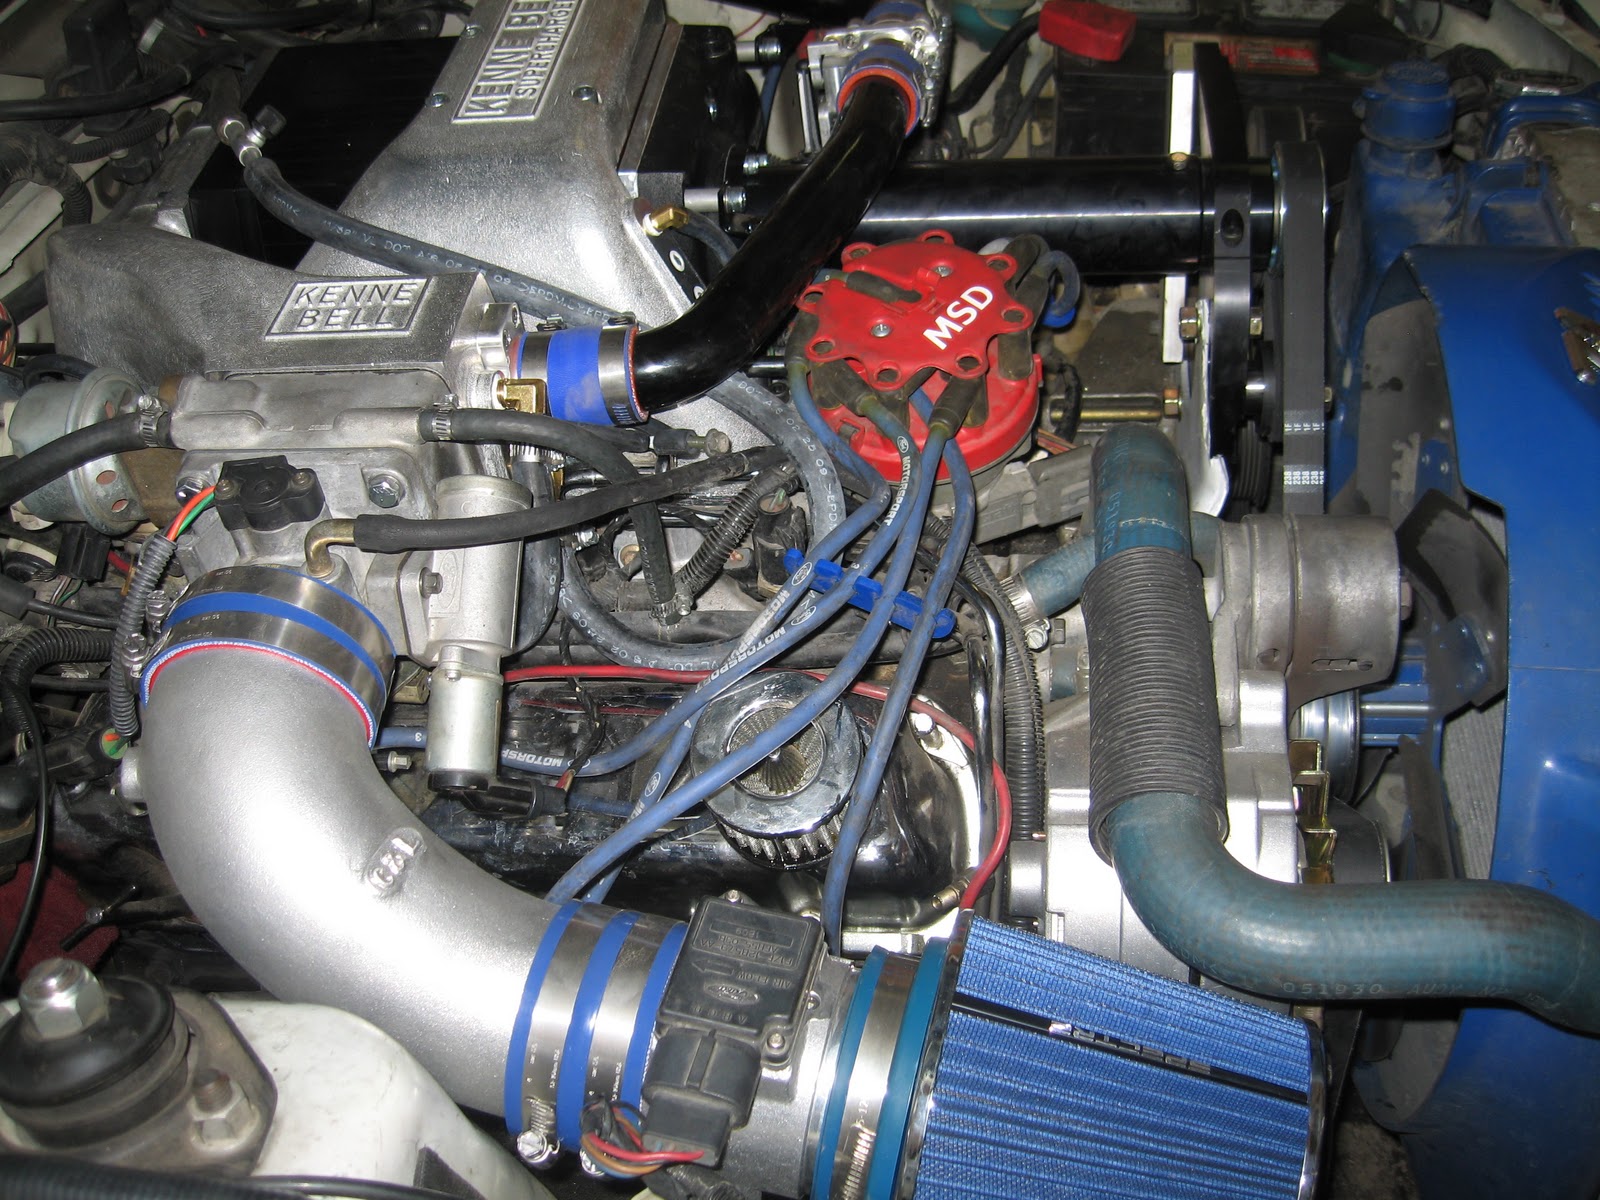
And now to elaborate on the custom-underhood CAI for the SC/302. I built this under the project name of my company NSP Motorsports. After doing the fiberglass speaker mount, this was going to be a piece of cake. I wanted something that would stand out and definitely give the engine bay some spunk (as if the huge Kenne Bell sitting there wasn't enough). This air box had to be specifically designed to fit my car because I also needed room for a overflow-reservoir, and I didn't want to mount mine to the back of the radiator like I've seen done before. It just looks trashy. 
Here is the original mock-up. The inward curve is where the overflow-bottle would mount, 
while still providing enough space for the filter to fully function.


I was guessing the entire time on how the overflow would fit, because I'm impatient and had only ordered it while I was building the box. I had most of the dimensions, but there was still a bit of guesswork I had to do.


Here's the filter being tested for size and angle. Everything looks good!


I originally used a screw and washer to hold it all in place, but later I decided that a plastic rivet 
looked more professional.

 Got the NSP Motorsports vinyl decal on. Looks good!

And here is the finished product. I think it looks great. I obviously don't have the reservoir
bottle installed here, but you can see where it is supposed to sit.

I noticed a 10* cooler difference in the engine temperature overall (as compared to before, where the filter was half-exposed, and half-inside the fender-well). It never goes above 175*, and the air flows smoothly through the box. 

Thursday, February 17, 2011

Vinylography

The seats in my Mustang have been bad for almost as long as I've had the car. The leather started to crack and rip, so I put seat covers over them to slow down the process of destruction. I think I had them on there for about 3 or 4 years before I finally got around to taking care of the problem. I estimated the cost of reupholstering the front two seats to be around $300 for the front two seats in white leather, just like stock. But this is no stock Mustang. No, this is an SC/302, and I do not have things done for me. I do things myself. So I decided to reupholster my seats myself in black and white vinyl, with custom SC/302 embroidery. Check it out.
The old, nasty cracked leather seat compared to the new white vinyl.

I worked on the front bolster first, and when it was finished I compared it to the rest of the seat.
Picture-wise it looks very simple, but cutting the patterns and making everything fit right took quite a long time.
I remember staying up till 8 in the morning working on the embroidery for the back of the seat. 

 Here is the completed shell for the back of the seat.

And here is the seat completely finished. It is very wrinkly in this picture, but it has settled after being used a few times and it looks really good. I don't have a picture at the moment, but when I get new pictures I will post them up.


Wednesday, February 9, 2011

"Speak" To Me

One night in the middle of summer 2010, my friend Jeremy and I decided to take on a large, complicated project for the SC/302. We decided to replace the back seat with a custom-fiberglassed Premium Sound System. Check it out!:
This is what the rear looked like before the procedure
Tearing out the back


Laying down the base

Finished product

 The vinyl used for finishing the fiberglass wrinkled a bit, but looked good overall. Here's a few videos of how we did it.

Tuesday, February 8, 2011

Spoiler Alert!

It took me forever to find this spoiler! I may have paid a lot more for it that it was worth, because it has some damage done to it, but in the end it was worth it. As far as I know there is only one other copy of this spoiler on a fox-body, and even then it may not be existent anymore.
I had to get a trunk from a Mustang Coupe because mine had 22 holes in it, and was slightly warped. As you can see here, there was quite a bit of prep work to be done.
My spoiler had no possible way to mount it, so I had to create a way. See here at my other blog steps to mount something that came without any mounts at all: NSP Motorsports - How To Mount A Spoiler

The spoiler had some damage as I mentioned earlier. I can't find pictures of the repair I did, but when I do I will post them later. For now here are the pictures of Paint:


Monday, February 7, 2011

Exhaust 102

The Kenne Bell installation was finished, but the car couldn't be started just yet. First we had to build the exhaust. I bought some Summit Racing long-tubes for Angel, and I will never put long-tubes on a fox-body again, unless I'm putting in a new engine as well, because it was a huge pain in the butt. The exhaust system took about 8 months to complete, because I moved from Twin Falls back to Boise and didn't work on it again till the next summer. The entire exhaust system was built by me and my roommate in Twin Falls.

Here is the H-Pipe we built. Here it is seen tac-welded and just waiting for my roommate to make it all official
Ahhhh those gloriously red Cherry-Bombs! Here is our completed mid-pipe for the SC/302

We finished the mid-pipe in October 2009, and i started working on the rest in the summer of 2010:


 Figuring out the angles needed for the exhaust to work was the hardest part of building this last section, but after it was all finished it turned out just right. This was also my first time welding anything, so I thought I did a pretty good job for my first time.

Sunday, February 6, 2011

Time to Design

Now that the Kenne Bell was installed, it was time to create the rest of the package: The SC/302 Mustang. I started running through design idea after idea, and here are the results:


This only a small, tiny sample of all the ideas that I went though, and some which I am still considering. Let me know what designs you like!

Here are all the good pictures and designs that I worked with. Pay close attention, because sometimes only small details change. Enjoy the video!

Thursday, February 3, 2011

Time For ol' Kenny Bell

In august of 2008 I made a decision that was financially ridiculous, but my fun factor skyrocketed. I decided to treat Angel to a 2.1 Kenne Bell Blowzilla supercharger. I get asked how much the supercharger cost. That's no simple question. Yes, the supercharger alone cost roughly 3400, but everything else I did to go along with the supercharger probably cost me another 3k easily, and it would've been 4-5k if I'd decided to put new cylinder heads on the 5.0 as well. My friend's dad owned a repair shop, so they let me keep Angel there while I did my work. But I know you don't want to read anymore...so here are pics of the installation:
Boxes of goodies. My Kenne Bell Supercharger, FRPP 42lb injectors, 255lph fuel pump, C&L MAF housing, and some exhaust parts.

 
It's only slightly bigger than stock
Bright green 42 lb-ers will put a smile on anyone's face!

The "BoneYard" all of the stock parts are now useless.
Here is my roommate trying to siphon gas out of my tank so we could lower it and put the 255 pump in. His air hose idea didn't work, and I ended up sucking gas out the classic way. Mmmm gas....
It's oh-so-shiny and new!

To understand the irony of this picture, you'd have to look at CeetWarrior's channel on Youtube. He has a picture of himself doing this when he put his KB on, so I just wanted to poke a little fun at him!


Kenne Bell right angle
Kenne Bell left angle
Now I had the Kenne Bell installed, but I still couldn't have my fun. i had removed the stock exhaust manifolds and bought some Summit Racing long-tube headers, where my roommate and I built the rest of my exhaust system around....but that story will wait for another day.